Installing a new bathtub in your bathroom can be a daunting task, but with the right information, it doesn't have to be! This step-by-step guide will walk you through the process of installing a bathtub, from preparation to completion. With this guide, you'll be able to make sure that your bathtub is installed properly and safely, so that you can enjoy it for many years to come. Whether you're a novice or an experienced DIYer, this guide will provide all the information you need to get the job done right!The first step in installing a bathtub is to gather the necessary tools and materials. You'll need a level, a stud finder, a drill, a hacksaw, a caulking gun, screws, washers, and plumber's putty.
Additionally, you'll need to purchase the bathtub of your choice and the appropriate plumbing supplies for your particular model. Once you have all of your tools and materials, you can begin the installation process. Start by locating the studs in the wall where the bathtub will be installed. Use a stud finder to make sure you have identified all of them. Then mark the center of each stud with a pencil. The next step is to cut away any drywall that is in the way of the installation.
Use a hacksaw to carefully cut away any drywall that is blocking access to the studs. Be sure to wear safety goggles to protect your eyes from any dust or debris that may be produced during this process. Once you have removed any obstructions, you can begin attaching the mounting brackets to the studs. Use screws and washers to secure them in place. Be sure to use a level to make sure that they are properly aligned. Next, you'll need to attach the plumbing fixtures to the bathtub.
Depending on your particular model, this may require soldering or other specialized techniques. Make sure that all of your connections are tight and secure before continuing. Once the plumbing fixtures are in place, you can begin installing the bathtub itself. Place it into its designated area and secure it with screws and washers. Make sure that it is firmly attached to the mounting brackets and level with the floor.
Finally, use plumber's putty and caulk around the edges of the tub and all of your plumbing connections. This will help ensure that there are no leaks or water damage over time. Now that your bathtub is securely installed, you can turn on the water supply and enjoy your new tub!
Tools & Materials Needed for Installing a Bathtub
Before beginning the installation process of a bathtub, it is important to make sure that you have all of the necessary tools and materials. These include a level, a stud finder, a drill, a hacksaw, screws, washers, plumber's putty, and caulk. A level is an essential tool for ensuring that the bathtub is properly installed and that it is even in all directions.The stud finder will help you to locate the wall studs behind the tiles or walls. You'll also need a drill for boring pilot holes in the wall for the screws that will hold the bathtub in place. The hacksaw will be used to cut away any protrusions from the wall such as molding or trim. Screws, washers, and plumber's putty are used to secure the bathtub in place.
Finally, caulk is used to seal the area around the bathtub to keep water from seeping into the walls or floor.
Installation Steps for Installing a Bathtub
Locate Studs in Wall - Before you begin the installation process, locate the wall studs in your bathroom. This is an important step since you’ll need to attach mounting brackets to the studs for your bathtub. Use a stud finder to locate the studs and mark them with a pencil for reference.Cut Away Drywall
- Once you know where the studs are, use a drywall saw to cut away the drywall and create an opening for the bathtub.You’ll need to cut away enough drywall so that your bathtub fits securely in the opening.
Attach Mounting Brackets
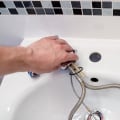
- After the drywall is cut away, attach the mounting brackets to the studs. Make sure the brackets are securely attached and check to make sure they’re level. This will ensure that your bathtub is stable and will prevent it from shifting.Attach Plumbing Fixtures - Connect the plumbing fixtures to the bathtub. This includes attaching the overflow drain, shower head, and spout. Make sure all the connections are tight and secure before moving on.
Install Bathtub
- Place the bathtub in the opening and make sure it’s level.Once you’re satisfied with its position, secure it to the mounting brackets with screws. Make sure all the connections are tight and secure.
Use Plumber's Putty and Caulk Around Edges
- Apply plumber's putty around all of the edges of the bathtub where it meets the wall and floor. This will ensure a watertight seal.Once the putty has dried, caulk around all of the edges of the bathtub for extra protection against water leaks. Installing a bathtub can be a daunting task for even experienced DIYers. However, the right tools, materials, and instructions can make it much easier. Before beginning the job, make sure to have all the necessary tools and materials, and be sure to follow safety protocols. With careful preparation and instruction, installing a bathtub can be done quickly and easily.

Leave a Comment